Planning a Jewelry Box Layout: Tiers, Drawers and Compartments
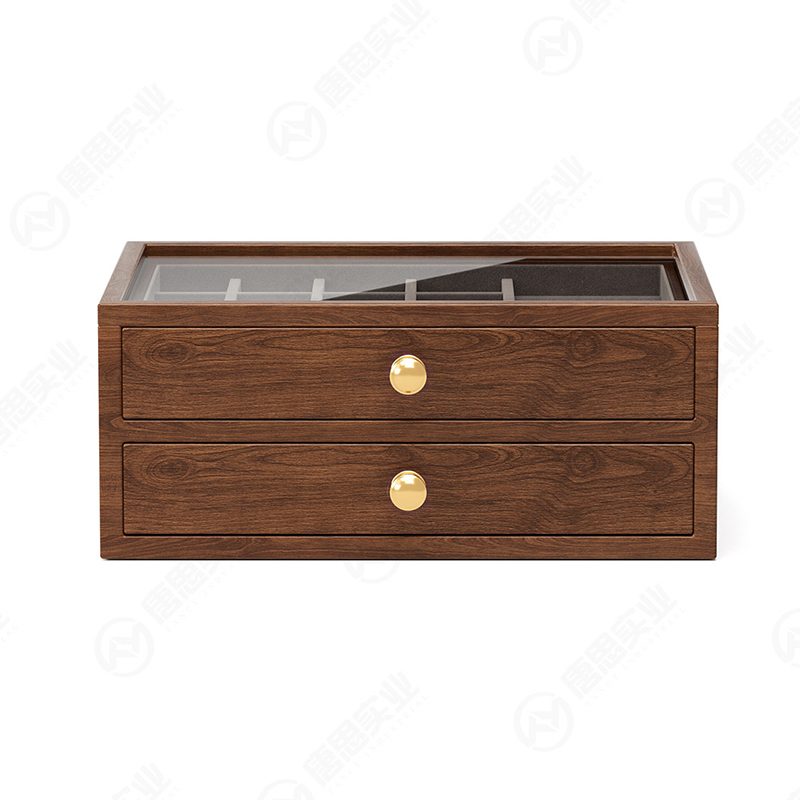
A jewelry box is judged twice. The first judgement happens on the shelf, where the material, the finish and the proportions do the work. The second happens at home, when the box is opened for the first time and the owner tries to put their actual collection into it. Plenty of beautiful boxes fail the second test — a pendant that will not lie flat, a drawer that opens onto tangled chains, earrings that have to be stacked because there is nowhere to pair them. None of that is a craft problem. It is a layout problem, and it is decided before the first panel is cut.
This guide covers how to plan that layout from the collection outwards: what to measure, how to choose between tiers, drawers and trays, how to size compartments by item type, and how to confirm the whole thing before you commit to a structure. Our custom jewelry boxes page shows the structures this planning feeds into.
Why layout decides whether a jewelry box works
Materials and finish are what sell a box in a photograph. Layout is what keeps it in use. A box that holds everything comfortably is opened daily; a box that forces the owner to rearrange things is opened twice and then left on a shelf. From a brand's point of view, that difference is the whole point of packaging that is meant to be kept — the box becomes part of the product experience rather than a wrapper around it.
Layout is also the most expensive thing to change late. Compartments are built into the insert, the insert is built into the body, and the body's depth follows the insert. Locking the layout before the structure means the sample round is about feel and finish; leaving it until after means a new insert, and often a new body as well.
Start with an inventory, not a drawing
Before any box is designed, write down what will actually go inside. Not the hero piece from the photoshoot — the real collection, including the awkward items: the chunky cuff, the long chain, the brooch, the oversized statement ring. For each item, note three numbers: its length and width as it will sit in the box, its thickness or height, and how many of them there are.
That last number is the one that catches people out. A layout designed for a six-piece capsule collection and a layout designed for a fifty-piece collection can use identical materials and look identical from the outside, while behaving completely differently inside. If the collection is expected to grow, plan the structure for where it is going rather than where it is today.
Tiers, drawers and trays: choosing the vertical arrangement
The vertical arrangement is the first real decision, because it fixes the overall height. A single-layer box with a lift-off lid is the simplest and the most presentation-friendly: everything is visible at once the moment it opens. It works well for sets, capsules and gift boxes where the reveal matters more than the volume.
A two-tier box adds a lift-out tray over the base compartment and roughly doubles capacity for a modest increase in height. It suits collections that split naturally into "displayed" and "stored" — rings and earrings on top, bracelets and larger pieces underneath. Beyond two tiers, a drawer arrangement usually reads better than stacked trays, because drawers give access without lifting the whole contents out.
Drawers are the right answer when the box is used rather than admired, and they need clearance, a pull, and enough depth to clear the tallest item inside. The trade-off is that the top surface becomes a lid rather than an opening, so the reveal is different. Many of the boxes we build combine both: a flip or lift lid over a shallow display tier, and one or more drawers below for the stored layer.
Sizing compartments by item type
Once the vertical arrangement is set, allocate the horizontal space. The principle is simple: items that are worn together should be kept together, and items that tangle should never share a compartment. Rings want small, shallow slots that stop them rolling; earrings want paired compartments so a set stays a set; bracelets want a wide, flat channel; necklaces want either a long channel with two anchor points or a hanging space with a hook, so the chain cannot knot itself.
Leave the compartments slightly deeper than the item they hold. A ring sitting proud of its slot will catch the lid, and a bracelet that fills its channel exactly will be hard to lift out with fingers alone. If a piece is heavy or awkward, consider whether a removable tray solves it better than a fixed compartment — a tray that comes out and sits on the dressing table is often more useful than a deeper slot.
Measure the reveal, not just the exterior
Two boxes can have identical outer dimensions and completely different interiors, because the walls, the base and the lid lining all consume space. What matters is the internal reveal: the clear dimensions the owner actually sees when the box opens. Specify the reveal, and specify the depth of the insert, separately from the external size.
This is also where the lid interface has to be checked. A hinged lid with a stay needs room to travel; a lift-off lid needs enough clearance to be lifted squarely off a full tray; a flip lid needs a hinge line positioned so it does not press on whatever is tallest inside. These are structural questions, but the answers come from the layout — which is why the two belong in the same conversation.
Handling chains, pendants and long pieces
Long pieces cause the most layout failures, and they are worth designing specifically. A chain laid in a shallow channel will move, and a moving chain tangles. The reliable answers are a channel long enough for the chain to lie in one length, a pair of anchor points that hold the ends apart, or a hooked hanging space where the pendant drops free and the chain stays vertical.
For pendants, height matters more than length: the compartment has to be deep enough that the pendant does not press against the lid lining. For layered sets, two parallel channels usually work better than one wide one, because they let each chain keep its own space. If long pieces are part of the range, plan them first — they are the constraint everything else fits around.
What lines the compartments, and why it matters to layout
Lining is chosen for feel and protection, but it changes the layout because it consumes depth. A velvet or suede lining adds softness and holds items gently, and a leather lining gives a firmer, more luxurious surface; foam and moulded inserts give the tightest control over position. Contrast lining — a darker interior inside a pale box, or the reverse — is a layout decision as much as a colour decision, because it changes how visible each item is when the lid opens.
Whichever is chosen, the insert has to accommodate it in the drawing. A compartment designed to exact item dimensions and then lined will be tight; a compartment designed with lining allowance will be right. Our jewelry box inserts guide compares the materials on protection, appearance and how they age.
Weight, balance and how the box is carried
A jewelry box filled with a real collection is heavier than the empty sample suggests, and that weight has to sit in the right place. A box carried by a single handle with all the weight in one corner is uncomfortable; a drawer-packed chest with a light lid tips when opened. Decide early whether the box is carried, stacked, displayed open or stored closed, and let that shape the arrangement.
Balance also affects hardware. Heavier lids ask more of a hinge, deeper drawers ask more of a runner, and a fully loaded tray needs support rather than a friction fit. Wooden bodies and engineered panels behave differently here, which is worth reading about on our custom wooden boxes page before the structure is frozen.
Confirming the layout, and a checklist to write into the brief
Reduced to one page, a jewelry box layout brief looks like this. Every row is a decision, and every decision should be made before the structure is drawn.
| Inventory | Every item type, its size as it sits, its thickness, and how many. |
|---|---|
| Vertical plan | Single layer, lift-out tray, multiple tiers, drawers, or a combination. |
| Compartments | Fixed or removable; count and size per item type; which pieces pair together. |
| Long pieces | Chain channels, anchor points or a hanging space; pendant clearance. |
| Reveal | Internal clear dimensions and insert depth, separate from external size. |
| Lining | Material, colour, contrast, and the depth it consumes. |
| Lid interface | Hinge travel, lift-off clearance, stay, and how the lid meets a full tray. |
| Handling | Carried, stacked, displayed open or stored closed; hardware that follows. |
The layout itself is confirmed in two stages. First comes 3D digital proofing, where geometry, tier heights, compartment positions and item clearances are shown before anything is cut — this is where an error costs nothing but a conversation. Then comes the physical sample, where the layout is tested with the actual items in hand: does the lid close cleanly with a full tray, does the tray lift without pulling, do the chains stay apart.
Bring real pieces to that test if you can. Sampling takes about 15 days and includes 3D digital proofing plus 2 rounds of revisions, which is enough time to correct a layout that has been tested properly and not enough to correct one that has not. Our packaging sampling guide explains what happens during those fifteen days.
Matching the layout to the materials and the finish
Layout and material are chosen together, because the material decides how precise the interior can be. Solid wood gives warmer edges and more weight; a veneer over an engineered panel gives a flatter, more dimensionally stable body that holds a tight lid fit across a large run. Leather and PU wraps add thickness at the edges and change the lid clearance; a lacquer finish changes how visible the interior is under light.
That is why we settle the layout, the material and the finish in the same design conversation, with woodworking, paint processing, hand leather work and assembly all under one roof. Custom OEM and ODM jewelry boxes start at 500 pcs per design, because the layout, the insert and the hardware are set up for your specification, while ready-to-ship designs start from 50 units per design. Sampling takes about 15 days and production about 30 days after order confirmation, with payment by T/T at 30% deposit and 70% before shipment, shipping EXW or FOB Guangzhou and express options via DHL, FedEx and UPS.
Share your collection list and a reference image of the look you are after, and we will come back within 24 hours with a layout direction and a quotation. LUXPCK has manufactured wooden and leather packaging for 18 years and has served more than 3,700 brands, with capacity of 80,000 pcs per month and over 100 ready-to-ship designs across the range. Certifications include ISO 9001, FSC, CE, RoHS and REACH.
Start from the collection and how the box will be used. A single layer with a lift-off lid gives the strongest reveal and suits sets and capsules. A lift-out tray roughly doubles capacity for a small increase in height and suits a split between displayed and stored pieces. Drawers read better than stacked trays once there are three or more layers, because they give access without lifting everything out.
Slightly deeper than the item it holds. A ring that sits proud of its slot will catch the lid, and a bracelet that fills its channel exactly is hard to lift out with fingers alone. Remember that the lining consumes depth too, so the insert has to be drawn with lining allowance rather than to exact item dimensions.
Give long pieces their own space rather than sharing a compartment. The reliable options are a channel long enough for the chain to lie in one length, a pair of anchor points that hold the ends apart, or a hooked hanging space where the pendant drops free and the chain stays vertical. Pendant clearance matters more than chain length, because the piece must not press into the lid lining.
In two stages. First 3D digital proofing settles geometry, tier heights, compartment positions and item clearances before anything is cut. Then the physical sample is tested with the real pieces in hand — does the lid close cleanly over a full tray, does the tray lift without pulling, do the chains stay apart. Sampling takes about 15 days and includes 2 rounds of revisions; production takes about 30 days after order confirmation. Custom OEM and ODM jewelry boxes start at 500 pcs per design, with ready-to-ship designs from 50 units per design.