Laser Engraving on Wooden and Leather Boxes: Depth, Artwork and What It Cannot Do
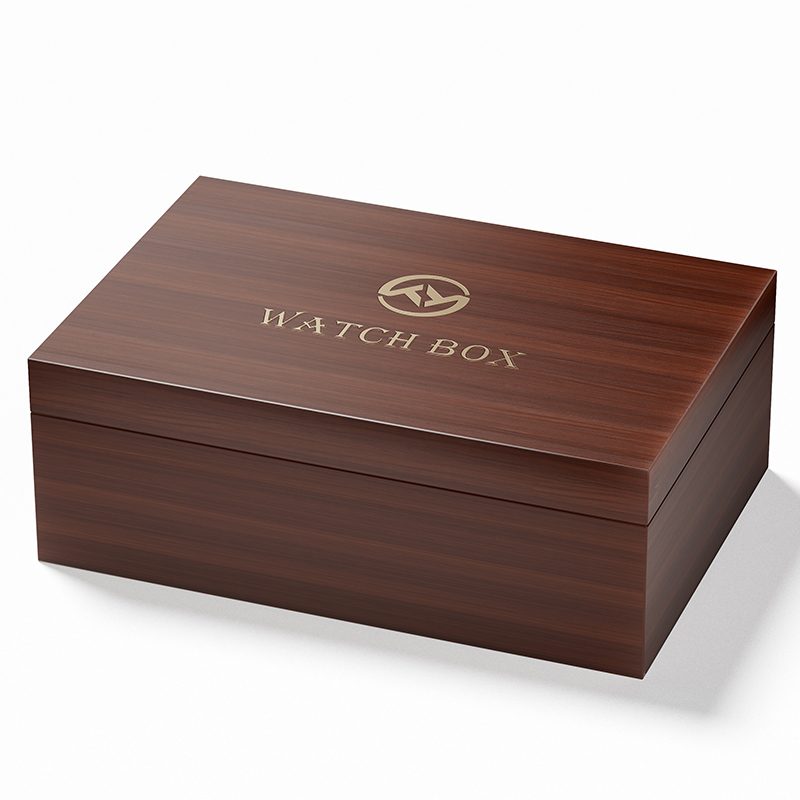
Laser engraving is the quietest marking method in packaging. It adds no ink, no foil and no metal plate — it takes material away, and the mark you see is the inside of the box itself. That is exactly why it works on timber and leather, and why the material, not the artwork, decides how fine the result can be.
This guide covers how engraving behaves on wooden and leather boxes: what a factory needs from your artwork, how depth and contrast are controlled, how grain and leather change the outcome, where the mark should sit, and the personalisation runs that engraving makes practical.
What the laser actually does
A focused beam removes a shallow layer of the surface, and the heat leaves a darkened edge where it cut. There is no ink to fade and no plate to lift, so the mark lasts as long as the box does. The colour is the substrate's own — tan turning brown on light timber, dark brown to near-black on darker species, and a burnt tone on leather.
Two consequences follow. First, engraving is a single-colour process: you cannot engrave a brand blue, you can only engrave a shade of the material. Second, the mark is physical — you can feel it, which is why it reads as craft rather than print on a surface meant to be touched.
In our lines the laser sits alongside CNC forming, so the same drawing that drives the cut also drives the mark. That matters for alignment: a logo engraved relative to the lid rebate stays centred even if the lid is trimmed slightly differently from the drawing.
Why it suits wood and leather — and where it fails
Wood engraves beautifully because it is not uniform. The beam meets dense latewood and open earlywood differently, so a single pass produces a natural tonal variation across a grain line. On a natural-finish box that variation is the point; on a box that needs a mechanically identical mark on every unit, it is a variable to control.
Leather engraves well when the surface is veg-tanned or lightly finished, because the burn reads as a deliberate darkening. It behaves badly on heavily coated or very soft aniline leathers, where the beam can glaze the finish or produce an uneven edge instead of a clean line.
Three surfaces are the wrong place for a laser:
| Surface | What happens | What to do instead |
|---|---|---|
| High-gloss piano lacquer | The beam breaks the mirror layer and leaves a dull, matte scar | Engrave the panel before lacquering, or mark with foil |
| Thin decorative veneer | Settings that read well on solid timber burn through to the core | Reduce depth, or engrave a solid insert set into the lid |
| Coated or metallised PU | Coating melts before the base does, giving a ragged edge and a smell | Test on the exact material, or use debossing |
If your box is lacquered, read the engraving decision together with our piano lacquer finish guide — the order of operations is what protects the surface.
Artwork: what the factory needs from you
Engraving is driven by paths, so the file has to describe paths. Vector artwork in AI, EPS or PDF is the reliable input; C4D and PDF are also accepted for structural work and layout. A JPEG of a logo can be traced, but every traced curve is an interpretation, and thin serifs rarely survive it.
Four rules cover most of the problems:
| Rule | Why |
|---|---|
| Convert text to outlines | A missing font on the production machine silently substitutes a different typeface |
| Keep strokes above the minimum | Hairlines and thin scripts fill in at small marking sizes |
| No gradients or halftones | The laser has one tone; gradients become a single flat depth |
| State the finished size | A mark scaled to fit the lid changes its legibility, not just its size |
The practical test is to print the artwork at final size on paper and look at it from arm's length. If a detail is already marginal there, the laser will lose it.
Depth and contrast: three settings, one decision
Depth is the only variable that changes how engraving feels, and there are really three settings worth specifying.
| Setting | What it looks and feels like | Where it belongs |
|---|---|---|
| Surface mark | A shadow you can feel with a fingernail, minimal texture change | Fine type, dates, discreet interior marks |
| Standard engraving | A visible groove with a defined char line, comfortable to touch | Logos on lids, monograms, most brand marks |
| Deep engraving | A carved relief that catches light and shadow | Large motifs, decorative panels, marks that will be paint-filled |
Whichever setting you choose, it has to be held constant across the run. That means one program per drawing, with power and speed recorded so a reorder months later starts from the same parameters instead of from somebody's memory — the same discipline that keeps colour and finish consistent between batches, described in our reorder consistency guide.
Wood: grain, species and the char line
On timber, the same setting produces different results across a single panel. Dense grain engraves dark and crisp; open grain absorbs and spreads, softening the edge. On a strongly figured species the mark can disappear into the figure at one end of the lid and stand out at the other.
Three material choices reduce the risk. A tighter, finer-grained species holds detail better than an open one — the differences are set out in our wood species guide. A solid insert or a small plate gives the beam a consistent surface without fighting the grain direction. And an engineered panel such as MDF engraves very evenly, though it reads flatter, which is why it is usually hidden under a veneer or a lacquer rather than left bare.
The char line is the detail most often missed at approval. Fresh engraving leaves loose carbon in the groove; on a light timber it can smear across the panel during handling. Ask how the sample was cleaned, and confirm the same cleaning step is in the production routing — on a natural-finish box, that step is what keeps a mark looking sharp rather than dusty. Veneer and solid bodies behave differently here, as covered in our solid wood versus veneer guide.
Leather and PU: heat, edge and colour
Engraving leather is controlled burning, so the variables are the same ones that matter in any heat process: how much energy, for how long, on what finish. The mark comes out darker than the hide, which works in your favour on tan, natural and mid-brown leathers and works against you on black.
On dark leather the answer is usually depth rather than colour: a deeper engraving catches light at the edge of the groove and reads without relying on tonal contrast. On very light leather, the opposite risk appears — a heavy setting can scorch the surrounding surface and leave a halo around the mark.
PU is the material that needs a test piece before anything else is agreed. Some PU engraves cleanly; some melts, gives an uneven edge and releases a smell that lingers in a closed box. Where the wrap is a coated PU, debossing or a metal plate is often the better answer — our leather wrapping guide covers how the wrap itself behaves at corners and edges, which is where an engraved panel meets the rest of the box.
Where the mark should sit on a box
Placement is a structural question as much as an aesthetic one. Engraving removes material, so it belongs where the panel is thick and flat, and away from edges that are already machined thin. On a custom wooden box, that usually means the centre of the lid and a base panel, with the interior left to the lining.
| Position | Best for | Watch out for |
|---|---|---|
| Lid top, centred | The brand mark, the mark customers photograph | Grain figure; keep a clear margin to the lid frame |
| Inside the lid | A quieter mark, a dedication, an edition line | Lining must be applied after engraving, not before |
| Base panel | Names, dates, serials — invisible when displayed | Keep it off the surface that scuffs in handling |
| Inset plate | Fine detail that the body material cannot hold | Adds a part; recess depth and fixing must be agreed |
One rule survives every layout: do not engrave across a joint, a veneer seam or a wrapped corner. The beam follows the surface, and a groove that crosses two panels will not line up after assembly.
Personalisation: one name or one logo
These are two different production jobs, and confusing them is how personalised orders run late.
A brand mark is a single program run on every unit — the same as any other marking method, with no tooling and no setup cost per piece. Individual personalisation is variable data: every unit carries a different name, which means a different file per piece, a fixed jig position, and a sequence check at packing. The engraving is fast; the handling is the work.
Where the volume is small, the practical route is to personalise a stock box rather than build a custom one. Our Tancy in-stock watch range covers more than 100 styles from 50 pieces, and a name engraved on the lid or the base of a proven format is a realistic gifting programme. A fully custom box with engraving starts at 500 pieces per design, because the body and lid are made to order. The two routes are compared in our in-stock watch boxes guide.
Two disciplines protect a personalised run: freeze the name list before the files are generated, and check the sequence against the packing list at the last station rather than at the end of the week.
Combining engraving with foil, paint fill and lacquer
Engraving rarely travels alone, and the order of operations decides the result.
Paint fill — engraving a groove and filling it with colour — gives a two-tone mark that still sits below the surface. It works on deep engraving and on large motifs; on fine type the paint bleeds past the char line and the edge goes soft.
Foil and engraving can coexist on the same box but not on the same millimetre. Foil needs a flat, sealed surface to release cleanly, so the usual arrangement is a foil mark on the lid and an engraved line inside, or an engraved motif with a foil-stamped wordmark beside it. The methods themselves — foil, screen printing and debossing — are compared in our logo finishing guide.
Lacquer is the operation that must come last, or not at all. Engraving under lacquer fills with coating and the mark flattens into a shadow; engraving through a cured piano finish breaks the mirror and leaves a dull scar that no polishing will restore. Either engrave first and lacquer around a masked area, or keep the engraving on an unlacquered panel.
What to check on the sample
Engraving is approved by eye and by fingertip in about two minutes, if you know what to look for. Six checks cover it:
| Check | What a pass looks like |
|---|---|
| Legibility at arm's length | Counters in letters are open, thin strokes have not merged |
| Depth consistency | The groove feels the same from one end of the mark to the other |
| Char residue | No dark smudge outside the groove; a white cloth wiped across leaves nothing |
| Edge quality | A clean line, not a feathered or blistered boundary |
| Position | Margins to the lid frame are equal; grain runs as intended behind the mark |
| Adjacent operations | Lining, lacquer and hardware did not disturb the mark |
Put the artwork, the depth setting, the material and the position on the purchase order rather than in an email thread — engraving is one of the few specifications that cannot be corrected after the fact without remaking the panel. Sampling takes about fifteen days with 3D digital proofing and two rounds of revision, production about thirty days after approval, with ten stages from timber cutting through to final inspection. Third-party inspection is welcome, and the checks worth adding are in our packaging QC inspection guide.
Engraving is worth the discipline because it is the one mark that never looks applied. Get the material and the depth right, and the box appears to have been made with the name in it.
Yes, and it is usually the most durable option on an unlacquered timber surface, because there is no ink or foil to wear. Send vector artwork in AI, EPS or PDF with text converted to outlines, and state the finished size. The mark has to be tested on the actual species: dense grain engraves crisp and dark, open grain softens the edge, and a strongly figured panel can swallow small detail. Approve the sample against a printed proof at final size.
On leather, yes — the mark comes out darker than the hide, which works well on tan and mid-brown and needs extra depth to read on black. On PU, always test first: some grades engrave cleanly, others melt at the edge and leave a smell inside a closed box. Where the wrap is heavily coated or metallised, debossing or a metal plate is usually the better answer, and engraving should stay off wrapped corners and panel joints.
Yes, but treat it as a variable-data job rather than a printing job: one file per name, a fixed jig position, and a sequence check against the packing list at the last station. Personalising a stock format is the practical route at small volumes — the Tancy in-stock watch range covers more than 100 styles from 50 pieces. A fully custom engraved box starts at 500 pieces per design, since the body and lid are made to order.
Vector artwork in AI, EPS or PDF with text as outlines; C4D and PDF are also accepted for structural work. Sampling runs about 15 days including 3D digital proofing and two rounds of revision, and production about 30 days after sample approval. Engraving depth, position and material are written on the purchase order, because a mark cannot be corrected afterwards without remaking the panel.